Monday brief
Clay Sculpting Guide: Detailed Techniques for Hollow Figure Construction
When creating human figures from clay, mastering specific structural techniques is essential to ensure the piece can be safely fired in a kiln. Unlike solid sculptures, ceramic figures must be hollow to allow for even heating and to prevent explosions caused by trapped moisture. This tutorial, inspired by Leonardo da Vinci’s masterpiece Lady with an Ermine, breaks down the ceramic sculpting process from the torso to the base.
Dylan Robert Ellington
Desk note
Brief tip
The full sticky-note brief continues below on the Monday desk.
Board
Desk Notes
When creating human figures from clay, mastering specific structural techniques is essential to ensure the piece can be safely fired in a kiln. Unlike solid sculptures, ceramic figures must be hollow to allow for even heating and to prevent explosions caused by trapped moisture. This tutorial, inspired by Leonardo da Vinci’s masterpiece Lady with an Ermine, breaks down the ceramic sculpting process from the torso to the base.
Foundation and Torso Construction
Slab building is the most efficient method for constructing a ceramic figure. It is recommended to start with a sturdy slab base, which provides a stable center of gravity and significantly reduces the risk of the side walls cracking during firing. Always remember to cut a vent hole in the center of the base to prevent air from expanding and causing damage at high temperatures.
When building the torso, use clay slabs approximately 1.2 to 1.8 cm thick. For medium-sized works, clay bodies containing "grog" (crushed fired ceramic) are ideal, as they enhance structural support and improve drying characteristics. Reinforce all joints by scoring the surfaces and applying slip (liquid clay). To prevent a heavy head and neck from collapsing into the chest, install a horizontal "truss" or clay bridge inside the shoulders; this internal support helps distribute weight evenly between the front and back of the piece.
Integrating Arms and Animal Figures
Before attaching extensions like arms, you must cut ventilation openings in the main body to ensure air circulation between the interior spaces. Arms can be modeled as hollow tubes and joined to the torso and base using slip. You can use a wooden paddle to refine the contours of the clay or trim away excess material to optimize the silhouette.
In this project, an ermine is skillfully integrated into the woman’s embrace. Begin by forming the animal's body with a curved slab, taking care not to close it entirely to maintain a controlled thickness. Once the ermine is secured to the figure's torso, build the neck upward using coils and create the head using the pinch-pot method. Use wooden tools to define the features and a toothed scraper to etch a realistic fur texture into the surface.
Hand Sculpting and Fabric Details
Hands are the most delicate part of a clay sculpture and should be completed independently before being joined to the arms. For smaller figures, cut the hand's silhouette from a slab and gently pinch the clay to form individual fingers. Use a stylus or needle tool to detail the knuckles, palm lines, and fingernails. When installing the hands, ensure the fingers are thoroughly bonded to any surface they touch. To prevent these fine parts from drying too quickly and cracking, wrap them in plastic to ensure a slow, even drying process.
When rendering clothing, avoid simply draping slabs over the torso, as different shrinkage rates often lead to cracks. A more professional approach is to integrate the garment’s contours directly into the primary torso slabs. Use thin clay coils to represent fabric folds and drapes; by smoothing one side of the coil into the base while keeping the other side raised, you can simulate a realistic hemline. Additionally, pressing burlap or rope into the damp clay can provide the artwork with authentic textile textures.
Head Construction and Facial Features
The neck should be constructed as a slightly forward-leaning hollow cylinder. Attach a "V-shaped" piece of clay to the top of the neck to serve as the chin, and wait until it reaches leather-hard consistency before extending the face upward.
To accurately position the features, lightly sketch a "T-line" on the face. The eyes sit on the horizontal axis; start by pressing your thumbs in to create eye sockets and poke a small ventilation hole in the center. Embed two identical clay spheres into the sockets, then layer thin coils to form the upper and lower eyelids, refining the creases with a wooden tool. For the nose, cut a small opening in the face and push the clay out from the inside to form the bridge, then add supplemental clay to sculpt the nostrils. The mouth is created through precise incisions and pressing techniques to make the lips appear naturally turned out.
Final Closing and Hair Details
Once the features are complete, use a rounded slab to seal the top of the head. The closing slab can be slightly oversized; once secured, use a paddle to lightly tap it into shape, which helps compress the seams and ensures the head is structurally sound.
Hair can be expressed through various textural treatments. For example, a hollow clay tube can be carved with a braided pattern and fixed to the back of the head. Finally, add thin coils for forehead bands or eyebrows and use wooden tools to refine the entire figure's lines. Use a stylus to indent pupils into the eyes, giving your clay figure spirit and life.
More from this board
NOTE · en

Victoria Harbor The Shimmering Heart of Hong Kong
Victoria Harbor lies between Hong Kong Island and the Kowloon Peninsula in the Hong Kong Special Administrative Region. It is regarded as the largest harbor in Asia and one of the world’s major seaports, ranking behind San Francisco in the United States and Rio de Janeiro in Brazil. With its naturally deep waters and expansive harbor area, it has earned the nickname “Pearl of the Orient.” The harbor is particularly famous around the world for its spectacular nighttime scenery.
NOTE · en
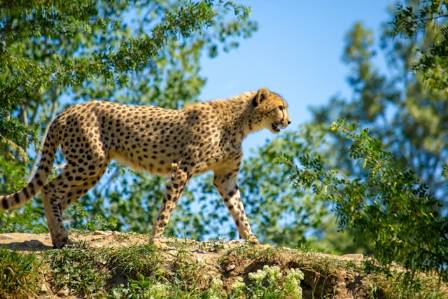
Cheetah: Conservation Conundrum
“The lion will fight, the hyena will escape, and the leopard will hide, but the cheetah is easy to kill. It becomes a challenge for young men and their dogs.” — Maasai elder
NOTE · en

Spaceships and Rockets
A rocket is a vehicle designed to transport spacecraft from the surface of Earth into space, typically to low Earth orbit or farther, and is often referred to as a launch vehicle.
NOTE · en
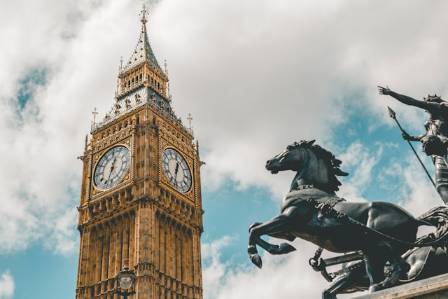
Elizabeth Tower Revealed: Fascinating Facts About Big Ben
Standing as one of London’s most recognizable landmarks, Elizabeth Tower, commonly referred to as Big Ben, is more than just a clock; it is a symbol of British heritage, endurance, and architectural achievement. Its presence on the banks of the River Thames has become synonymous with London itself, appearing in countless films, postcards, and photographs. Yet, despite its familiarity, many intriguing details about the tower and its famous bell remain lesser known. From its historical origins to its unique engineering feats, this guide explores ten fascinating aspects that make Big Ben an enduring marvel.
NOTE · en
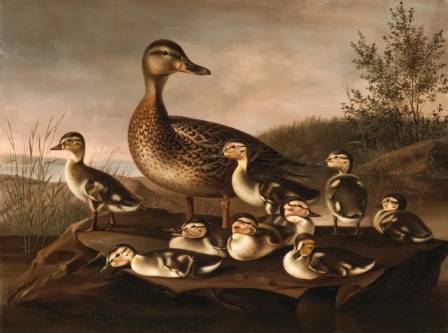
Easy Step-by-step Guide to duck drawing
Ducks are delightful creatures, known for their cheerful quacking and their charming waddle. Drawing ducks can be surprisingly easy and a lot of fun! Whether you want a cute cartoon duck or a more detailed illustration, this step-by-step guide will show you how. Let’s dive in!
NOTE · en

Eight Secrets of the Taj Mahal
For anyone visiting India for the first time, the Taj Mahal is an essential stop. This iconic mausoleum in Agra stands as India’s most celebrated monument and a timeless symbol of love. Commissioned by Mughal Emperor Shah Jahan between 1632 and 1647, it was built in memory of his beloved wife, Mumtaz Mahal, who tragically died during childbirth. Despite its global renown, many aspects of the Taj Mahal’s history remain mysterious. Here are some intriguing insights about this marble masterpiece.